How to create your best automation email sequence ever
Whether you are blogging or in any other business, your customers or prospects want to hear from you regularly. Because an effective followup or marketing system is critical to the success of your business.
But, how do you do this and still buy back time for other business activities?
This is quite simple, it can be achieved by setting up a series of timed emails to be sent out to your prospect using mailer lite the best free email service provider, so you never lose touch with them. What’s more, you continue to reap the benefit of this email sequence years as it’s experienced by every new subscriber added to the group.
And most importantly, these emails are tailored to achieve a particular purpose.
The steps to set up your automated email using mailerlite free email service provider
Step 1: Before you set up your email sequence there is a question to answer. The question is, “why do you want to set up your automated email sequence.” This is highly important because your email series must be tailored to meet a particular need.
Such as:
- To educate your prospects on the benefits of what you have to offer.
- Establish you as an authority.
- Increase engagement in your blog or business
- You may want to pitch a sale
- Create a community
- ReawaKen inactive subscribers
- You want to upsell to your customers after they make a purchase.
And more…
When you get this sorted out, the next step is …
Step 2: Plan out your emails based on your purpose. That’s writing out the content of the emails in your word document or google doc you want to send and decide on when you want them sent out. What is the sequence for this, is it on a specific date, before a specific date, after a specific date, is it a time period after the last step in the automation?
Step 3: Now is the time to head over to mailer lite the best free email service provider to create your automated emails
Step 4: Create an account with mailerlite You don’t need your credit card to do this. It’s absolutely free till you hit 1000 subscribers.
How does that sound?
This means you have ample time to master email marketing before you pay a single fee. Not only that, as a beginner this should be your best email service provider because you are not earning money yet to pay subscription fees.
The guys at mailerlite know by giving you this free opportunity to build your email list up to 1000 subscribers, paying the subscription fee from then on shouldn’t be a problem.
Moreover, mailerlite gives you free access to top features you can only get in other autoresponders at a fee. Features such as segmentation of your subscribers are premium features in other autoresponders.
Step 5: Create a new subscriber group.
Remember we talk about the segmentation of your subscribers above? This is where it begins. Create groups to be able to automate the emails that meet its specific needs.
Let’s assume you want to create a new group to increase engagement on your blog (you should be able to send out your new post by email, asking your audience question about what they want you to give them).
To create this new group go to your account and click on SUBSCRIBERS ON THE DASHBOARD.
Step 6. Click on GROUP in subcategory bar.
Step 7: On the right corner click on CREATE A NEW GROUP and name your new group.
Step 8:The next step is to create an automation email work flow..
This is where you automate your emails to go out to your subscribers at your stipulated time.
How do you do this?
Go to AUTOMATION on your dashboard and click on create a new workflow (see the red bar on the top right of the dashboard).. Name your workflow which ever name you like.
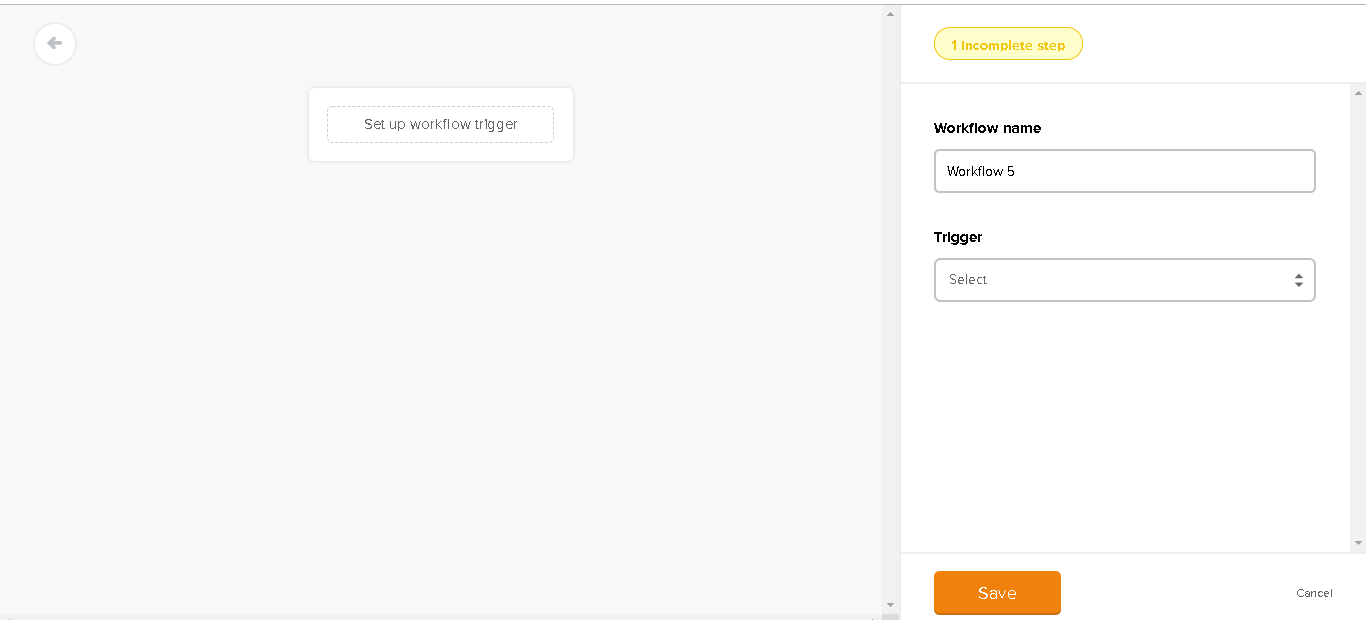
Step 9: Once you name your new workflow, you will be taken to the next page to set up a workflow trigger.
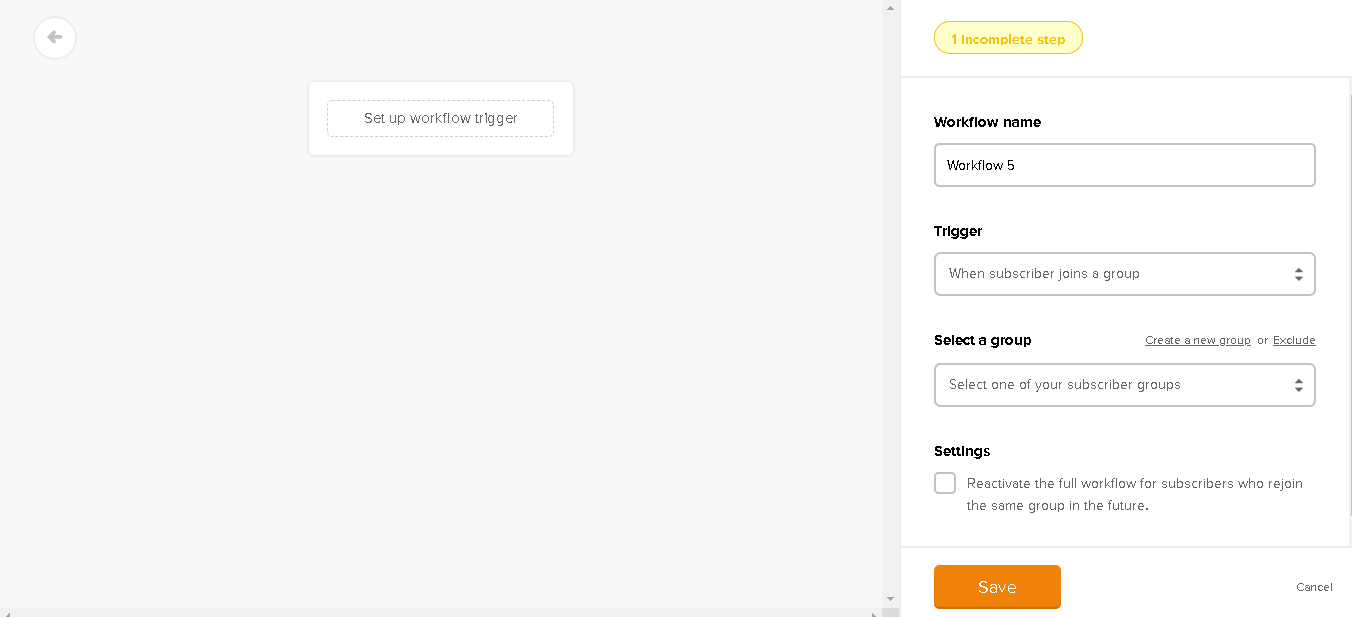
Give this workflow any name and Select the trigger by choosing any action you want to activate the emails in the drop-down menu.
For the purpose of clarity, let’s assume you, you chose “when subscribers join a group”
Step10: You’ll be asked to add a group. Next, add group and click the setting. Clicking the setting allows those who unsubscribed from the group and are rejoining the group to get the emails again. Next click save.
Step 11: Now, this step is where you begin to create your emails to go out at your stipulated time.
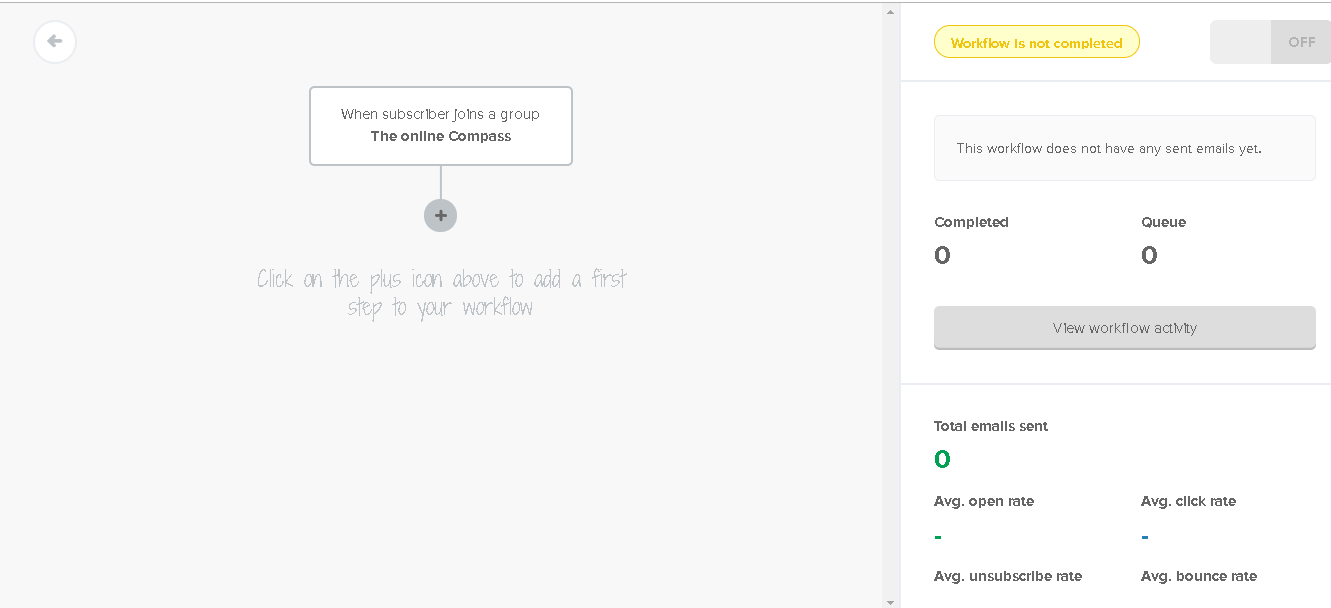
On your workflow board, you’ll see a blank canvas that you have the choice to design whichever way suits you best. Click on the +sign to add your first step to the workflow
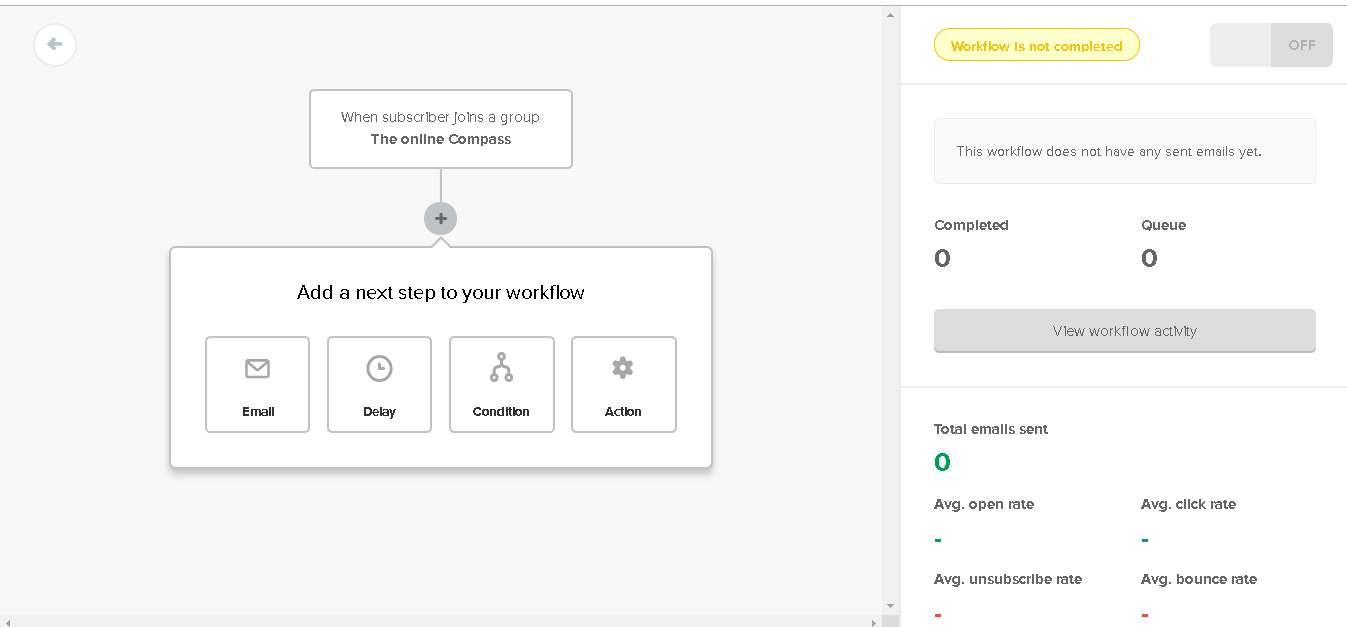
Step12: Once you click the plus sign, you will find email, delay, condition and action.
Each of these 4 elements has its specific function.
- Email – is where you load your emails.
- Delay – enables you to send out your emails at your stipulated time. Neglecting to do this will send all your emails out at the same time.
- Condition – allows you to customise your email based on what people signed up for.
- Action, – you can unsubscribe your subscriber, or move subscribers to a different group.
Step13: To add an email, click on the email box.
Next, write your subject line. Your subject line will appear in your subscribers’ email box as the title of your email. This has to be properly crafted to pique the interest of your subscriber and get him to click through to your email.
A poor subject line will make nonsense of all your email marketing effort because the subscriber will quickly delete it without reading it.
Step14: Next, design your email template. Mailer lite has an amazing template in its template gallery you can choose from.
Step 15: Set the delay. Specify the time interval of delivering the emails. Ensure to set the delays so that your emails don’t go out all at the same time. Or it will appear as spammed emails which could lead to unsubscription.
Step 16: You may not need to do anything about the condition and action in the first automation step.
Step 17: Finally, click done editing when you are satisfied with your work.
Now, you’ve succeeded in creating your workflow.
Step 18: The following steps will be for creating your sign up forms to capture your subscribers’ emails.
Mailer lite has 3 options for creating forms; the landing page, pop up form, and embedded form.
Step 19: To create forms in mailerlite, click on forms on the dashboard, choose the type of form you want to use. Next, go to CREATE FORM EMBEDDED FORMS (I’m assuming you chose to create embedded form).
Step 20: Name your form and select the group you want it added to. (this should be the group you created in step 5 above), And finally, design your form.
10 Days free blogging course for beginners. Get it here
- How to know your target audience for your business growth
- How to up your Facebook marketing by adding a custom tab
- How to keep your creative juice flowing and write consistently
- 7 reasons why your business needs a blog
- How to find the most profitable niche quickly
- How to know what to blog about
- 9 Easy Ways To Drive Massive Free Traffic Through Social Media

